

EPS to Machine Embroidery File: Turn Vector Art into Perfect Stitches
You have the perfect logo. The lines are crisp, the colors are vibrant, and it looks amazing on a business card or a website header. You hand that beautiful EPS file to the embroidery shop, confident you will get back a hat or shirt that looks exactly like the digital version. But when you see the final product, something is off. The edges are wavy, the text is barely readable, and the whole thing looks like it was stitched by a robot having a bad day. The problem is that you handed them a blueprint, but the embroidery machine needs a specific set of physical instructions. This is where the critical process of EPS to Machine Embroidery File conversion comes into play. You cannot just "save as" and hope for the best. You need to translate your vector masterpiece into a language of needles, thread, and fabric, and that takes a specialized skill.
Why Your EPS File is Just a Beautiful Picture to a Machine
An EPS, or Encapsulated PostScript, is a vector file. It is the gold standard for graphic designers because it uses mathematical equations to define shapes, lines, and curves. This means you can blow it up to the size of a billboard, and it stays razor-sharp . It is the perfect starting point for a project, but it is not the final destination for embroidery.
An embroidery machine is essentially a robot with a needle. It does not understand the concept of a "circle" or a "letter." It only understands coordinates. An embroidery file, whether it is a DST, PES, or EXP, is a set of commands that tells the machine exactly where to plunge the needle into the fabric, at what speed, and when to cut the thread . It is a mechanical roadmap. Your EPS file lacks all of this physical intelligence. It does not know about stitch angles, thread tension, or fabric density. So, before you can even think about stitching, that EPS needs to be digitized.
The Secret Sauce: It is Not Magic, It is Physics
The conversion process is known as digitizing, and it is more of an art form than an automated task. You are not just changing a file extension. You are designing a physical path for a needle to follow on a specific type of material . This is where the human element becomes absolutely vital. While there are automated tools that promise to do this for free, they often lack the nuance needed to produce a professional result .
Think of it this way: a machine does not know that fabric stretches or that thread has thickness. A human digitizer knows that a logo on a stretchy polo shirt needs different handling than a logo on a stiff canvas tote bag. They have to consider the physical properties of the materials to ensure the final product looks like the original artwork and does not pucker or distort.
Breaking Down the Workflow from Vector to Stitch
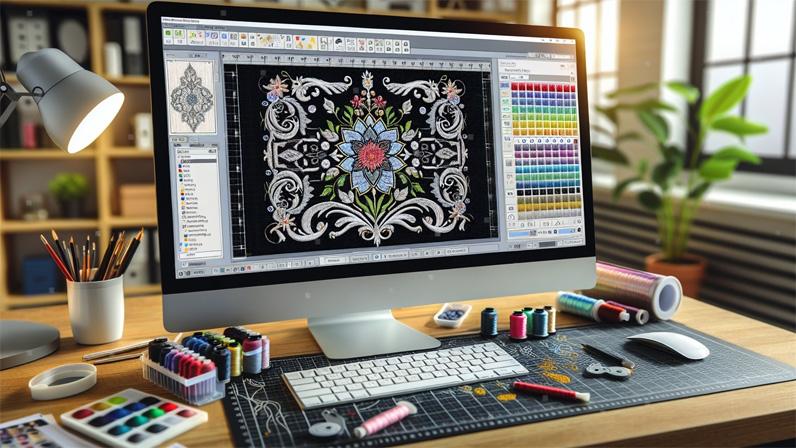
So, how does this digital alchemy actually happen? It starts with a clean EPS file. The digitizer imports this vector artwork into professional software like Wilcom Embroidery Studio or Hatch . The software recognizes the mathematical paths of the EPS, providing a perfect, scalable starting point.
The digitizer then goes to work, using the vector lines as a guide to create a stitch file. They will analyze the design and decide which areas need a satin stitch (great for borders and text), a tatami or fill stitch (for large, open areas), or a running stitch (for fine details) . They are essentially painting with thread, and the file is their brush.
The Physical Truths Your EPS Ignores
A few critical, physical realities come into play during the process that your EPS file never had to worry about.
First is pull compensation. Have you ever noticed that when you sew, the thread pulls the fabric? Now, imagine that happening thousands of times on a small logo. The fabric distorts. To counter this, a digitizer must intentionally distort the digital design in the opposite direction. They know the fabric will pull, so they make the design slightly wider or taller in the software so that the final stitched product settles into the correct proportion .
Second is underlay. This is the hidden foundation of embroidery. Before any visible thread is laid down, the machine sews a layer of support stitches. This underlay anchors the fabric, prevents the top stitches from sinking into the material, and ensures the logo is raised and crisp . If you skip this step, your beautiful logo will look like it is disappearing into the shirt.
The Cost of Automation and Free Converters
The internet is full of "free EPS to embroidery file converters," and it is tempting to use them. However, this is almost always a recipe for disaster. Automated software lacks the context to make good decisions. It cannot feel the fabric or anticipate the way a thread will lay down .
Using an auto-converter often results in "thread breaks," where the machine stops every few seconds because the stitch density is too high. It creates "jump stitches" that leave long, ugly threads across the back of the garment. It fails to apply proper underlay, leading to a design that looks flat and cheap. In short, a free online converter can ruin your fabric, break your needles, and waste your time. You will end up paying more in wasted materials and frustration than you would have spent on professional digitizing in the first place.
Choosing the Right Destination for Your File
Once the digitizing is complete, the file needs to be exported in a format your specific embroidery machine can read . You are not just creating one generic file. You are choosing a format based on the brand of the machine.
The most common format is DST, which is widely used by commercial machines like Tajima . If you have a Brother or Babylock machine at home, you will likely need a PES file . Janome machines use JEF, and Melco machines often require EXP . A professional digitizer will know which format you need and provide the correct export. This is why communication with your service provider is key. Tell them what machine you are using, or what machine your manufacturer is using.
Taking the Leap from Screen to Sample
The final, non-negotiable step is the test sew-out. Before you approve a massive bulk order, you must run a test sample on the exact fabric you intend to use . This is the only way to see how the colors look under different lighting, how the design feels to the touch, and if the density is appropriate. A professional service will often include a sew-out photo with the digitized file so you can catch any issues before the machines start running full speed.
Conclusion
Turning your vector art into a tangible, stitched reality is a journey of translation. It is about moving from the theoretical world of mathematical lines to the physical world of thread, fabric, and tension. The process of converting an EPS to a machine embroidery file is not a simple click. It is a deliberate, skillful craft. The human digitizer is the essential bridge between your graphic designer and the embroidery machine, applying physics, foresight, and artistic judgment to ensure your logo looks just as professional on a uniform as it does on your website. So, the next time you have a logo to embroider, do not trust a free online converter with your brand's reputation. Invest in the human touch and watch your design come to life, stitch by perfect stitch.
 French
 English
 Arabic
 Spanish
 Portuguese
 Deutsch
 Turkish
 Dutch
Dutch
 Italiano
 Russian
 Romaian
 Portuguese (Brazil)
 Greek
Greek
